
 I’ve been making this bread for a year and a half now and have made a couple of minor changes to the recipe for more consistent results. They are the kind of adjustments a seasoned bread baker would make because they know the consistency that bread should have at the different stages. The metric measurements are all by weight.
You’ll need some starter for this, so you’ll need to start at least a few days ahead. I’m a fan of rye starter as it seems to be easier to keep going and handle. The recipe is below.
Miso-Rye Bread
For the sponge:
1/3 cup warm water (77g)
1/2 cup starter (125g) Recipe follows or use your own
2 teaspoons sugar (11g)
1 cup unbleached all-purpose flour (142g)
1/2 c organic rye flour (60g)
For the final bread:
2 teaspoons instant yeast (9g)
1/4 cup warm water (60g)
1/4 cup white or red miso (65g) (lower sodium if possible) *to taste
1 teaspoon kosher salt (4g)
the sponge
2 cups unbleached bread flour (284g)
OR 2 cups all purpose flour plus 1 tablespoon wheat gluten(10g)
2 – 3 Tablespoons Malted Milk Powder or Barley Malt Powder (optional)
1 tablespoon caraway seeds (optional, I rarely use)
water bottle for misting the oven(optional)
The night before or several hours before combine the sponge ingredients together in a bowl and stir with wooden spoon until everything is combined. Feel free to add a tablespoon or two more water if the dough isn’t a bit soft and sticky. Cover with plastic wrap and let sit at room temperature until doubled in bulk. I turn my gas oven on for a minute and then back off and pop it in there. This makes about 85°F environment and speeds things along. It takes 3 hours or so at 85°F. You can test if it’s ready by seeing if a small pinch of it will float in water. If it does, it’s ready. Bring miso to room temperature.
Combine miso & water, whisk until smooth. Put 2 cups flour in the bowl of a stand mixer or a large bowl if you’re kneading by hand. Add yeast & malt powder, stir to distribute. Add the miso water mixture and the sponge. Add caraway seeds if using. Put the bowl onto the mixer outfitted with the dough hook. Start the machine kneading. Add additional flour if needed and keep kneading until you get a smooth and elastic dough. The dough should be a little sticky, but balling up and moving away from the sides of the bowl. I usually knead for a couple of minutes by hand on a floured board at this point.
Place the dough in an oiled bowl, turn it over once, cover an let rise until doubled in bulk. This takes about 45 minutes to an hour.
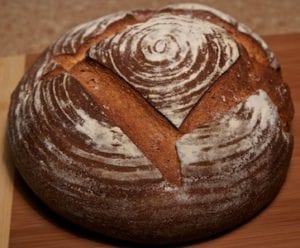
Punch down the dough. Optionally, you can repeat the rising. I usually form the dough into a round boule at this point and place it in a rising basket. Mine is a brotform that leaves a nice spiral on the top if flour it with a mixture of 1/2 rice flour 1/2 wheat flour before placing the dough in it. If you don’t have one you can use any bowl lined with a clean lint free kitchen towel (the flour sack kind) that has been dusted with flour. Or you can use the Abby Dodge method: put it into an oiled 8”- 9” cake pan.
Preheat the oven to 425°F with a pizza stone on the lowest rack.
Let the dough rise again until almost double in bulk, 30-45 minutes depending on how warm you kitchen is. It should bounce back lightly when poked. When ready, mist the oven with your water bottle. Dust a baker’s peel with cornmeal and turn the loaf out onto the cornmeal. Make some decorative slashes in the loaf and slide the loaf onto the pizza stone. Bake 5 minutes and mist the oven again. Try not to mist the loaf directly. Another method is to put a shallow pan of boiling water on the floor of the oven for the first 15 minutes of baking, removing it for the remainder.
Lower the temperature to 375°F and bake for 45 – 60 minutes or until the loaf sounds hollow when tapped on the bottom. It should have a internal temperature of at least 200°F, you can test this with an instant read thermometer inserted in the bottom. It will get quite dark if you cook it longer, but you certainly can if you like it that way. I find darkly cooked bread a little bitter. So people like that.
Scott’s notes: They do make low sodium miso, try to use that because salt can inhibit yeast. If you’re using regular miso cut down the salt by half. I’m not super fond of the caraway seeds, but some might like. Today when I made this recipe it required quite a bit more flour to get the right bread consistency. When done mixing it should be only slightly sticky.
Rye Starter
3 Tablespoons organic rye flour
3 Tablespoons bottled or distilled water
a jar
I’ve found rye starter easier to get going and easier to maintain. After you get it going you can convert it slowly to a white starter by feeding it unbleached white flour. Always use water that isn’t chlorinated. I use distilled.
• Day 1: mix the flour and water in a jar. Loosely cover.
• Day 2: feed the starter with 2 Tablespoons of rye flour & 2 Tablespoons of water. Stir it all up. Loosely cover. It should start smelling yeasty at this point.
• Day 3: throw out roughly 1/3 of the mixture and feed again. Loosely cover.
• Day 4: repeat
• Day 5: it should be fairly active at this point and ready to use. Keep it going by throwing out roughly 1/3 and feeding. It improves with age.
After your starter is active you can keep in the fridge and only feed it once a week or so. And you can feed it in much larger feedings to get the amount of starter you need. Just add enough water to keep it a thickish paste. No harm if you add extra water, but I find it easier to work with on the thick side.
If at any point the mixtures smells bad, start over. It should smell yeasty and bit sour, but not like ammonia.
You don’t always have to discard part of the starter. If I’m baking the next day I usually don’t. If you’re worried about the waste, it’s probably only a penny’s worth.
If you’d like more detailed explanations and instructions on the starter: click here.